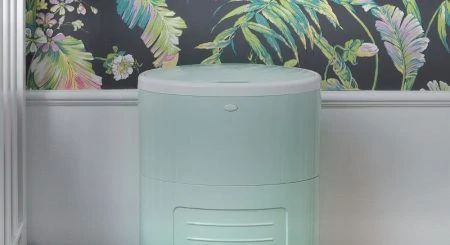
Diaper pails are great for containing the awful stench of your sweet baby’s toxic waste, but sometimes the inside of your pail will retain that smell long after the diapers are gone. Not only does it smell awful, but your diaper pail may be harboring mold, which can compromise your health or your baby’s health if left unchecked.
We’ve been on a mission to find the best methods of eliminating diaper pail nastiness, and we’ve found the solution!
In this guide, you will learn why it’s important to keep your diaper pail clean and the exact steps to clean any kind of diaper pail so you can get rid of that stack of nose-clothespins and breathe freely when opening or emptying your diaper pail.
Key Takeaways
- Diaper pails can retain odors and harbor mold, which can compromise health. It is important to clean diaper pails regularly and store them in a well-ventilated area.
- A combination of water, borax, white vinegar, and tea tree oil can be used to clean a diaper pail.
- To minimize odors between cleanings, you can dump feces into the toilet, use regular scented trash bags, use dog poop bags, and store the diaper pail in a dry, open room.
- Clean the diaper pail about every three months.
Dirty Diaper Pails – A Health Hazard
Diaper pails, especially those with a closed system, have the potential to become a mold battlefield.
Take Note
Mold has been known to cause respiratory issues, headaches, dizziness, fatigue, and allergic reactions (1). So, it’s important to clean your diaper pail regularly and store it in a well-ventilated area.
If you’re already dealing with mold, you’ll need cleaning products to both kill it and prevent it from growing again.
We’ve done the hard work for you and can tell you that a combination of water, borax, white vinegar, and tea tree oil works amazingly well! To make this cleaner, follow these steps:
- In a spray bottle, add 2 tablespoons of borax.
- Add 2 cups of warm water.
- Swish for 30–60 seconds or until the borax is fully dissolved.
- Add 1/4 cup of white vinegar.
- Add 20–40 drops of tea tree oil.
- Shake well before spraying.
Minimize Odors Between Cleanings
Most people don’t do this, but you should be dumping the poop into the toilet whether you use cloth or disposable diapers. Dumping feces into the toilet eliminates odors, reduces bacteria growth in your diaper pail, and is better for the environment (2).
Another way to minimize odors is to use regular scented trash bags instead of Diaper Genie refill bags. This also saves you money as those refills are quite expensive. It’s fairly simple to use regular trash bags in your diaper genie.
Another idea is to first put the dirty diapers in a dog poop bag before tossing them in the diaper pail. You can get cheap, effective ones at any dollar store. Also, keep a roll in your diaper bag for when you are out in public and restrooms don’t have a dedicated diaper pail.
While doggie poop bags are nice to have on hand for wet clothes, either from swimming or accidents, don’t forget to take them out immediately when you’re home. I’ve forgotten about them for a couple of days before, and it was tough to clean my diaper bag again.
Store your diaper pail in a dry, open room as well. The more airflow, the less diaper stink.
Life Saver
You can also purchase deodorizing discs to keep in your diaper pail. Some diaper pails have a special compartment for these discs, but for others, you’ll have to be creative. We’ve had success in taping them to the inside of the diaper pail.
How To Clean A Diaper Pail
This can be a smelly job, but if you don’t take steps to deep clean your diaper pail thoroughly, you will be dealing with even worse smells and potentially mold and mildew.
We know what it’s like to be a busy mama, but we recommend that you clean your diaper pail about every three months using the following method:
- Get rubber gloves ready — this is going to get dirty.
- Remove and dispose of the dirty diapers in your diaper pail.
- Remove the bag cartridge from the top of your diaper genie.
- Take your diaper pail outside or to the bathtub for cleaning.
- Using your garden hose or showerhead, rinse off the exterior and interior of your diaper pail.
- Squirt castile soap (or any dish soap) all over the interior and exterior of your diaper pail.
- Sprinkle baking soda all over the interior of your diaper genie to neutralize the bad odors.
- Let sit for about five minutes to let the soap and baking soda penetrate.
- Using an old, clean rag or sponge, scrub the interior and exterior of the pail.
- Then, rinse out the interior and exterior of your diaper genie.
- To prevent mold and mildew, spray the inside of the pail with the borax, vinegar, and tea tree oil concoction mentioned earlier, and rub it in with another cleaning rag using circular motions.
- Re-spray the inside with the borax solution.
- Let the inside of the pail air dry for as long as possible. If it’s not dry by the time you need it, dry it off with a towel. You can also dry the outside of the pail after rinsing.
Cleaning A Cloth Diaper Pail
The process of cleaning your cloth diaper pail is similar to the above steps for cleaning a disposable diaper pail. There are just a few key differences:
- Wash the pail liner in the wash with your cloth diapers as usual.
- Using either your shower head, diaper sprayer, or garden hose, spray down the inside and outside of your diaper pail.
- Be sure to leave some water in the bottom of the pail.
From here, follow steps 6–13 listed above.
Keep Things Fresh
If you put in some elbow grease every three months or so, you can have a clean diaper pail that’s free from bad odors and bacteria.
Prevent the dirty diaper smell between cleanings by always disposing of feces in the toilet, using scented garbage bags instead of the expensive diaper pail refills, tying up the dirty diapers in doggie poop bags, and using deodorizing discs.
When was the last time you cleaned your diaper pail?
